LaTeX Lists and Tables
Overview
Teaching: 0 min
Exercises: 0 minQuestions
How do I add a table to my document?
Objectives
Learn how to make an itemized list
Learn how to make an enumerated list
Learn how to make a descriptive list
Know how tables are arranged in LaTeX
Create a simple table
Be able to justify cells of a table
Deal with linebreaking within cells
Use line barriers to make a table easier to read
Make tables with multi-row or column stretches
Adjust sizes, spacing, and placement of a table
Itemized Content
Often it is useful to include itemized content in a document. This can take the form of bullet
points, numbered lists, and descriptions. LaTeX can handle all of these forms of content. Each
is called with a different command, and the lists will be styled and ranked according to the rules
of the documentclass. All lists follow the same basic structure. An environment is called with
the type of list, and each point is an item within the list. Every time we want to “indent”
(think 1.. 2a.. 2b.. 3..) we need to create a new list environment within the confines of an
item. The following list types will show how the same content can be represented in each type.
Itemized Lists
Itemized lists are also called “bullet point” lists. Each item is not ranked, but obeys hierarchy.
Itemized lists are called with itemize:
\documentclass{article}
\begin{document}
  \begin{itemize}
    \item The first item on our list
    \item The second item on our list
    \begin{itemize}
      \item The second item on our list, part 1
      \item The second item on our list, part 2
    \end{itemize}
    \item The third item on our list
  \end{itemize}
\end{document}
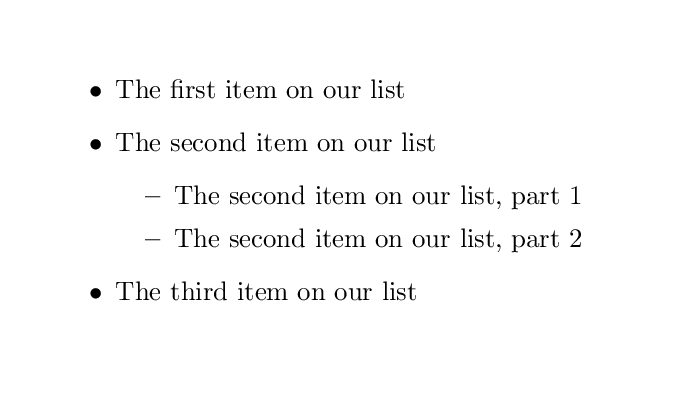
Note that text that follows item does not need to be within curly braces. All text following
an item is assumed to be part of that point when inside an itemize environment.
Enumerated Lists
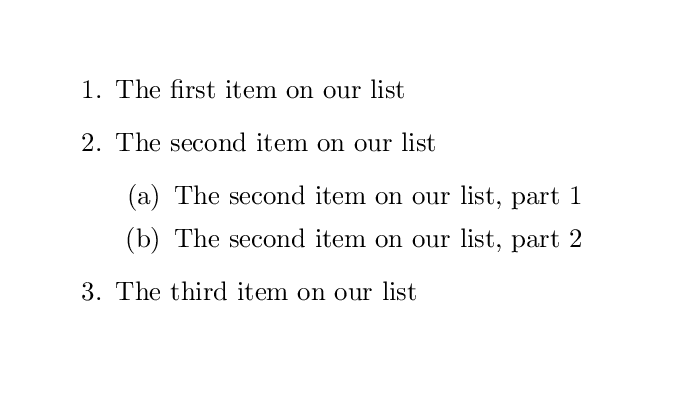
Numbered lists are similar to itemized lists, except they are, obviously, numbered. Each item is
ranked in order that it appears and respects hierarchy. Numbered lists are called with
enumerate:
\documentclass{article}
\begin{document}
  \begin{enumerate}
    \item The first item on our list
    \item The second item on our list
    \begin{enumerate}
      \item The second item on our list, part 1
      \item The second item on our list, part 2
    \end{enumerate}
    \item The third item on our list
  \end{enumerate}
\end{document}
If we desire, we can also nest different types of lists. Hierarchy will be respected for all nested lists, even if the labeling scheme is not the same.
\documentclass{article}
\begin{document}
  \begin{enumerate}
    \item The first item on our list
    \item The second item on our list
    \begin{itemize}
      \item The second item on our list, part 1
      \item The second item on our list, part 2
    \end{itemize}
    \item The third item on our list
  \end{enumerate}
\end{document}

Descriptive Lists
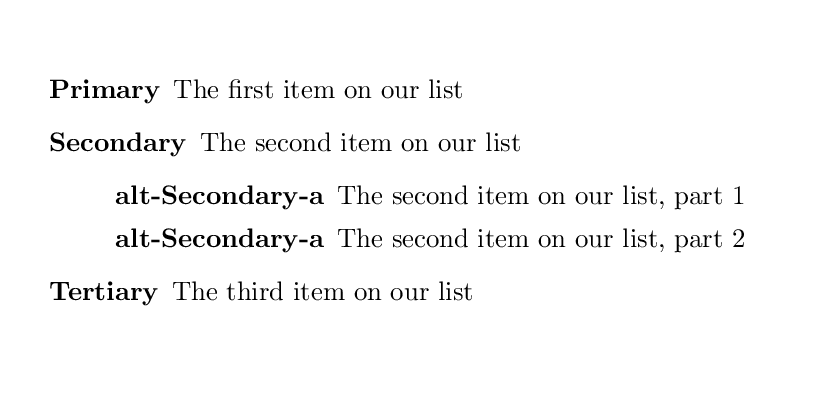
Descriptive lists are a bit like definitions. If we read a dictionary, we do not expect each word
to be numbered. So description lists can appear without a bullet or numeral. Descriptive lists
can, however, use an option box. This will, depending on the style of the document declared in
documentclass, appear emboldened, with ample spacing, before the body of the item text.
\documentclass{article}
\begin{document}
  \begin{description}
    \item[Primary] The first item on our list
    \item[Secondary] The second item on our list
    \begin{description}
      \item[alt-Secondary-a] The second item on our list, part 1
      \item[alt-Secondary-a] The second item on our list, part 2
    \end{description}
    \item[Tertiary] The third item on our list
  \end{description}
\end{document}
Advanced Lists
There are lots of options when working with lists, and they can be customized in many ways. Packages exist which can redefine the organization of a list, such that it appears horizontally, spaces definitions based on the longest entry, use a custom image as a bullet point, and much more. Exploring these options will be left to the user as need arises.
LaTeX Tables
Tables in LaTeX are declared using the tabular environment. When declaring this environment,
you must know how many columns of data you will be presenting before you start. The first
argument required when preparing a table is the alignment of each piece of data within the cell.
Then, data are listed in the environment with an ampersand & between each column.
\documentclass{article}
  \begin{document}
  \begin{tabular}{ c c c }
    A1 & B1 & C1
  \end{tabular}
\end{document}
Another Row? Another Line Break!
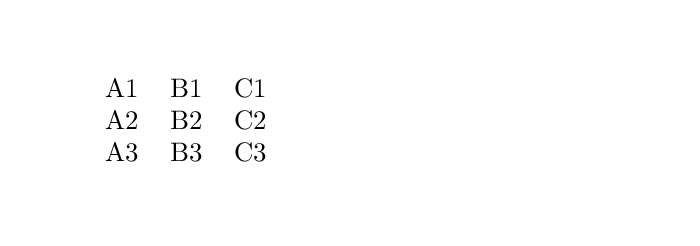
Rows are manually declared by starting a new line with \\.
\documentclass{article}
  \begin{document}
    \begin{tabular}{ c c c }
      A1 & B1 & C1 \\
      A2 & B2 & C2 \\
      A3 & B3 & C3
    \end{tabular}
\end{document}
Column Alignment
Columns in the tabluar environment are declared in the first argument, surrounded by curly
braces. The alignment of the contents of each column is declared here. A column can be told to
align toward the left margin (l), toward the right margin (r), or to align itself in the center
of the cell (c)
\documentclass{article}
  \begin{document}
  \begin{tabular}{ l r c }
    A1 & B1 & C1 \\
    A222 & B22 & C2 \\
    A3 & B333 & C33
  \end{tabular}
\end{document}
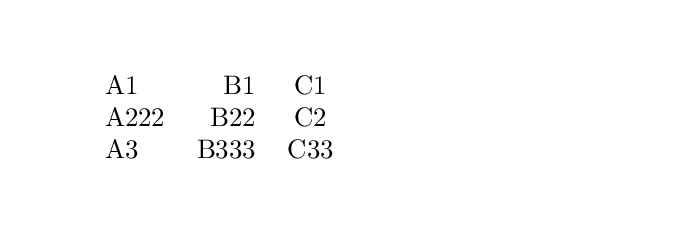
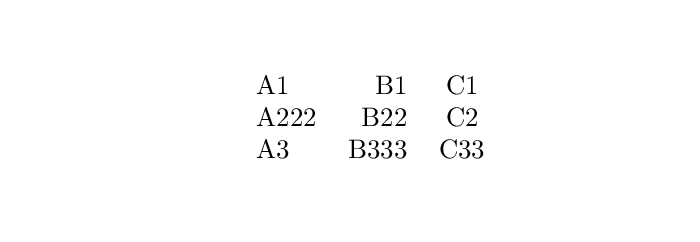
Table environments are types of floats. They can be told where to position (h, t, b, p)
much in the same way as figure floats. However, they should NOT use the centering command.
Telling a table to use centering will cause all content within the table to be centered. This is
often undesirable. Instead, to center a table, place the tabular environment within a center
environment.
\documentclass{article}
  \begin{document}
  \begin{center}
    \begin{tabular}{ l r c }
      A1 & B1 & C1 \\
      A222 & B22 & C2 \\
      A3 & B333 & C33
    \end{tabular}
  \end{center}
\end{document}
It is a best practice to organize your columns in your LaTeX file by the size of their content. This will make it easier for you to read and make edits. Most editors should use a monospace font, making this easy to implement.
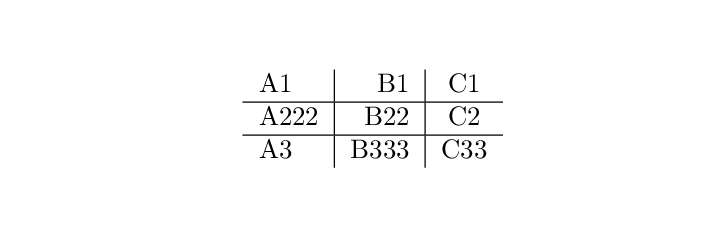
Horizontal and Vertical Separators
A table with dividing lines can be generated by declaring horizontal bars (|) in the column
alignment description. Bars placed between the alignment characters will become vertical lines
throughout the table.
\documentclass{article}
  \begin{document}
  \begin{center}
    \begin{tabular}{ l | r | c }
      A1 & B1 & C1 \\
      A222 & B22 & C2 \\
      A3 & B333 & C33
    \end{tabular}
  \end{center}
\end{document}

Horizontal lines are generated using the hline command. These are generally added next to the
newline commands \\ for rows in the table.
\documentclass{article}
  \begin{document}
  \begin{center}
    \begin{tabular}{ l | r | c }
      A1 & B1 & C1 \\ \hline
      A222 & B22 & C2 \\ \hline
      A3 & B333 & C33
    \end{tabular}
  \end{center}
\end{document}
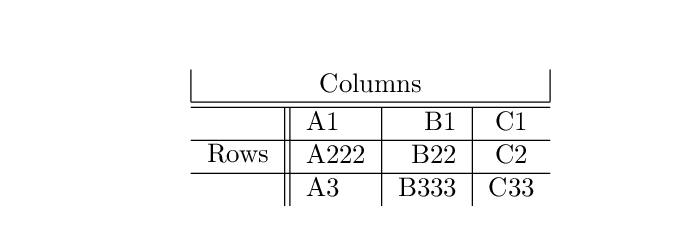
Stretching or Merging Cells
To combine the contents of cells, a special cell is declared using either multicolumn or
multirow, depending on the context. These commands are defined in the multirow package. The
multicolumn command requires one set of curly braces declaring the number of columns or rows to
stretch, a second set of curly braces which describes the alignment and bars to use with the cell,
and a third set of curly braces for the contents.
The multirow command uses a similar structure, save the contents of the second set of braces.
In the multirow second set of braces, the width of the new row is defined. It is recommended to
simply place * in this spot, which allows the multirow to stretch dynamically based on the
other rows. A multirow cell will require a column, so don’t forget to leave room for it.
\documentclass{article}
\usepackage{multirow}
  \begin{document}
  \begin{center}
    \begin{tabular}{ c || l | r | c }
      \multicolumn{4}{|c|}{Columns} \\ \hline \hline
      \multirow{3}{*}{Rows}
      & A1 & B1 & C1 \\ \hline
      & A222 & B22 & C2 \\ \hline
      & A3 & B333 & C33
    \end{tabular}
  \end{center}
\end{document}
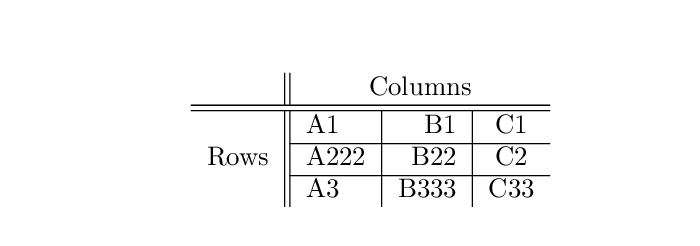
Controlling hline can become challenging when using a multirow. In the example above, the
overzealous lines look ugly when they cut across the combined cell. To cope with this, we change
our hline commands to cline. The cline is exactly the same, but with the ability to specify
the rows for the line to be visible on. With some careful arrangement, we can make our simple
table look professional.
\documentclass{article}
\usepackage{multirow}
  \begin{document}
  \begin{center}
    \begin{tabular}{ c || l | r | c }
      & \multicolumn{3}{c}{Columns} \\ \hline \hline
      \multirow{3}{*}{Rows}
      & A1 & B1 & C1 \\ \cline{2-4}
      & A222 & B22 & C2 \\ \cline{2-4}
      & A3 & B333 & C33
    \end{tabular}
  \end{center}
\end{document}
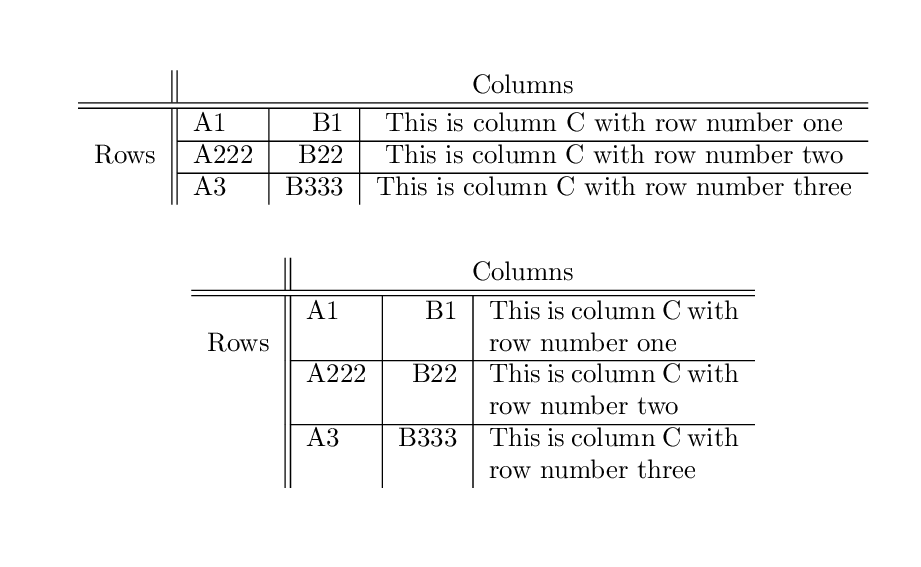
Text Wrapping and Cell Size
Sometimes, a large amount of text will be entered into a cell. However, LaTeX does not
automatically wrap text within a cell. The size of the cell is fit to the contents, so a very
long sentance in a cell can make the size strange, or even extend it beyond the page. A special
alignment can be used in this case, p. Compare these two examples:
\documentclass{article}
\usepackage{multirow}
  \begin{document}
  \begin{center}
    \begin{tabular}{ c || l | r | c }
      & \multicolumn{3}{c}{Columns} \\ \hline \hline
      \multirow{3}{*}{Rows}
      & A1 & B1 & This is column C with row number one \\ \cline{2-4}
      & A222 & B22 & This is column C with row number two \\ \cline{2-4}
      & A3 & B333 & This is column C with row number three
    \end{tabular}
  \end{center}
    ~
  \begin{center}
    \begin{tabular}{ c || l | r | p{3.3cm} }
      & \multicolumn{3}{c}{Columns} \\ \hline \hline
      \multirow{3}{*}{Rows}
      & A1 & B1 & This is column C with row number one \\ \cline{2-4}
      & A222 & B22 & This is column C with row number two \\ \cline{2-4}
      & A3 & B333 & This is column C with row number three
    \end{tabular}
  \end{center}
\end{document}
Float the Table
Since the LaTeX tabular environment is a float, we can apply options to it in much the same way
as figures. As we have seen, the location on the page can be controlled with h, t, b, p.
We can also take advantage of the float rules to scale contents. Floats can be thought of as
miniature pages within our page. If we place this into a new environment that changes the size
of the tabular environment to meet our needs. In this way, very large tables can fit on
relatively smaller sized pages.
The resizebox and scalebox commands provided by the graphicx package can be used to change
the size of a float. The resizebox command takes the form of width, height, and contents in
separate sets of curly braces (the character ! is used as a wildcard). Likewise, the scalebox
command requires a ratio and the contents in two separate sets of curly braces.
\documentclass{article}
\usepackage{multirow}
\usepackage{graphicx}
  \begin{document}
    \begin{center}
      \resizebox{10cm}{!}{
        \begin{tabular}{ c || l | r | c }
          & \multicolumn{3}{c}{Columns} \\ \hline \hline
          \multirow{3}{*}{Rows}
          & A1 & B1 & C1 \\ \cline{2-4}
          & A222 & B22 & C2 \\ \cline{2-4}
          & A3 & B333 & C33
        \end{tabular}
      }
    \end{center}
    ~
    \begin{center}
      \scalebox{2}{
        \begin{tabular}{ c || l | r | c }
          & \multicolumn{3}{c}{Columns} \\ \hline \hline
          \multirow{3}{*}{Rows}
          & A1 & B1 & C1 \\ \cline{2-4}
          & A222 & B22 & C2 \\ \cline{2-4}
          & A3 & B333 & C33
        \end{tabular}
      }
    \end{center}
\end{document}
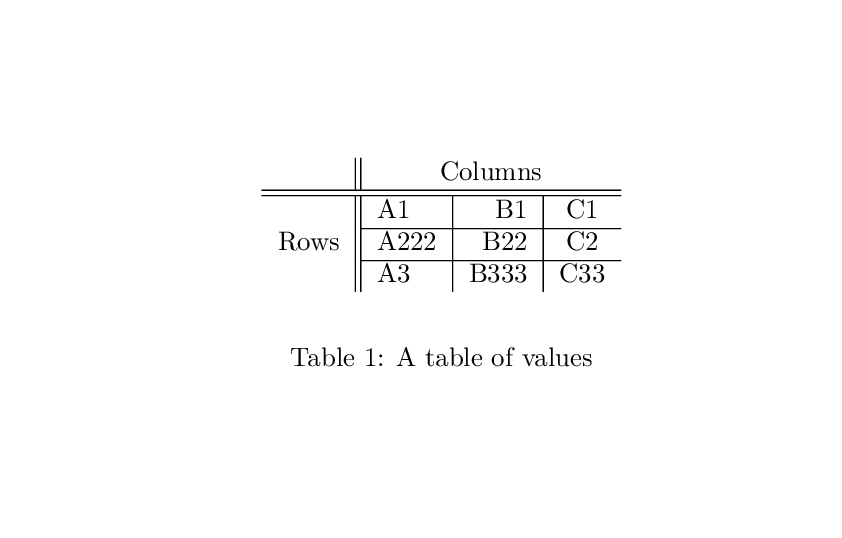
As long as we are treating the table as a float, it is worth noting that other properties present
in the figure environment can be applied to the table environment such as captions. Note that
this requires the table environment in addition to the tabular environment.
\documentclass{article}
\usepackage{multirow}
  \begin{document}
  \begin{table}[t]
    \begin{center}
      \begin{tabular}{ c || l | r | c }
        & \multicolumn{3}{c}{Columns} \\ \hline \hline
        \multirow{3}{*}{Rows}
        & A1 & B1 & C1 \\ \cline{2-4}
        & A222 & B22 & C2 \\ \cline{2-4}
        & A3 & B333 & C33
      \end{tabular}
    \end{center}
    \caption{A table of values}
  \end{table}
\end{document}
Key Points
Convert text to a bulleted list with
itemizeConvert sequential to a numbered list with
enumerateDefine terms with a
descriptionlistCreate a basic table with
tabularJustify cells with
l,c, andrPosition text within cells vertically with
t,c, andbUse
pto wrap lines of text within a cellCreate vertical barriers between columns with
|Create horizontal barriers between rows with
hlineUse
multicolumnandmultirowto make joined cellsAdjust the size scale of a table using
resizeboxInfluence page position with float positioning arguments
h,t,b, andp